How to Clean Baseboard Heaters: Complete Safety Guide 2026

How to clean baseboard heaters involves turning off power, allowing cooling time, then vacuuming dust and debris from heating elements using proper tools and safety precautions. Regular cleaning improves heating efficiency, prevents fire hazards from dust buildup, and eliminates that burning smell when heaters first activate each season. Moreover, proper maintenance extends your heater’s lifespan while reducing energy costs and improving indoor air quality throughout your home.
Most homeowners overlook this essential maintenance task, yet baseboard heater cleaning requires only basic tools and about 30 minutes per unit. Furthermore, the process differs slightly between electric baseboard heaters and hydronic systems, but both benefit from consistent seasonal care. Additionally, knowing when to attempt DIY cleaning versus calling professionals can save money while ensuring safety.
This comprehensive guide covers everything from safety precautions and required tools to step-by-step cleaning procedures for different heater types. You’ll also learn about building materials that improve indoor comfort and discover maintenance schedules that keep your heating system running efficiently year-round.
TL;DR
- Safety first: Always turn off power and wait 30+ minutes for cooling before cleaning any baseboard heater
- Essential tools: Use vacuum with brush attachment, soft-bristled brush, microfiber cloths, and compressed air for thorough cleaning
- Cleaning frequency: Clean baseboard heaters twice yearly (before and after heating season) to maintain efficiency and prevent fire hazards
- Professional help: Call experts for damaged fins, electrical issues, or if heaters don’t work properly after DIY cleaning
Why Clean Baseboard Heaters: Safety and Efficiency Benefits
Regular baseboard heater cleaning prevents serious fire hazards that develop when dust accumulates on heating elements. Dust buildup creates combustible material that can ignite when temperatures reach operating levels, particularly during the first heating cycle of each season. Additionally, thick dust layers act as insulation barriers that force heating elements to work harder, creating dangerous overheating conditions.
Clean baseboard heaters operate at 15-25% higher efficiency compared to dust-covered units, translating to significant energy savings throughout heating seasons. Furthermore, unobstructed airflow allows heated air to circulate properly, reducing the workload on your heating system. Consequently, homeowners typically see noticeable reductions in monthly energy bills after implementing consistent cleaning schedules.
Fire Safety Alert
Improved indoor air quality represents another crucial benefit of baseboard heater maintenance, as clean units don’t circulate dust particles, pet dander, and allergens throughout living spaces. Dirty heaters act as dust distributors every time they cycle on, spreading accumulated debris through convection currents. Moreover, this circulation pattern particularly affects individuals with respiratory sensitivities, asthma, or allergies.
Extended heater lifespan results from reduced strain on internal components when airflow remains unobstructed and heating elements don’t overheat. Clean baseboard heaters last 20-30% longer than neglected units because dust accumulation forces components to operate beyond designed parameters. Therefore, regular maintenance prevents costly repairs and premature replacement needs.
The elimination of burning dust smell provides immediate comfort benefits when heaters activate after summer dormancy periods. Accumulated dust burns off during initial heating cycles, creating unpleasant odors that can persist for days without proper cleaning. However, pre-season maintenance removes this debris before it can create offensive smells or potential smoke concerns.
Professional cleaning services report that homeowners who maintain annual cleaning schedules experience fewer service calls and repair needs compared to those who neglect baseboard heater maintenance. Additionally, clean heaters respond more quickly to thermostat adjustments, providing better temperature control and enhanced comfort throughout heating seasons. Building materials that improve indoor comfort work more effectively when heating systems operate at peak efficiency.
Safety Precautions Before Cleaning Baseboard Heaters
Safety preparation forms the foundation of successful baseboard heater cleaning. Electrical hazards pose the greatest risk during maintenance, making proper shutdown procedures absolutely critical. Furthermore, hot surfaces can cause severe burns if heaters haven’t cooled adequately before cleaning begins.
Power Shutdown and Verification
Turn off power at the circuit breaker rather than relying solely on thermostat controls. Circuit breakers provide complete electrical isolation, while thermostats may still allow power to flow to heating elements. Additionally, label the breaker position to prevent accidental restoration during cleaning activities.
Thermostat shutdown serves as a secondary safety measure but never replaces proper breaker control. Many homeowners mistakenly believe thermostat adjustment eliminates all electrical risks during maintenance. However, electrical current can still flow through wiring even when thermostats read “off” positions.
Test heater shutdown using the back of your hand held approximately two inches from heating elements. This method safely detects residual heat without direct contact that could cause burns. Moreover, infrared thermometers provide precise temperature readings if available in your maintenance toolkit.
Cooling Period Requirements
Wait 30-45 minutes minimum after shutdown before beginning cleaning procedures. Baseboard heating elements retain significant heat long after power disconnection, particularly during cold weather operation. Consequently, rushing this cooling period increases burn risk substantially.
Ambient temperature affects cooling duration, with colder rooms requiring extended waiting periods. Professional cleaning services typically allow one hour cooling time regardless of environmental conditions to ensure complete safety. Therefore, plan cleaning sessions during periods when heating isn’t immediately needed.
Essential Safety Equipment
- Safety glasses protect eyes from dust particles and debris during cleaning
- Work gloves prevent cuts from sharp metal edges and fins
- Dust mask or N95 respirator filters airborne particles and allergens
- Knee pads provide comfort during extended floor-level work
- Flashlight or headlamp illuminates dark areas behind heater units
Protective gear becomes especially important when cleaning heaters in basements or crawl spaces where ventilation may be limited. Professional cleaning services emphasize respiratory protection because accumulated dust often contains allergens, pet dander, and microscopic debris. Additionally, proper lighting prevents accidental contact with electrical components or sharp edges.
Pre-Cleaning Inspection
Visual damage assessment identifies potential hazards before cleaning begins. Look for cracked heating elements, loose wiring connections, or damaged protective covers that could create safety risks. Furthermore, common maintenance oversights often reveal underlying issues requiring professional attention.
Corrosion signs indicate moisture problems that compromise both safety and efficiency. Rust formation on heating elements suggests ventilation issues or humidity concerns requiring investigation. Moreover, water damage around baseboard units may signal plumbing leaks or inadequate vapor barriers.
Safety Warning
Documentation of existing conditions protects against liability concerns and helps track maintenance needs over time. Photograph any damage before proceeding with cleaning to establish baseline conditions. Subsequently, this record-keeping proves valuable for warranty claims or insurance purposes if problems develop later.
Essential Tools and Supplies for Baseboard Heater Cleaning
Successful baseboard heater cleaning requires specific tools that effectively remove accumulated dust while protecting delicate heating elements. Professional cleaning services rely on specialized equipment to ensure thorough maintenance without damaging expensive components. Moreover, proper tool selection determines cleaning efficiency and prevents costly repairs from inappropriate cleaning methods.
Core Cleaning Equipment
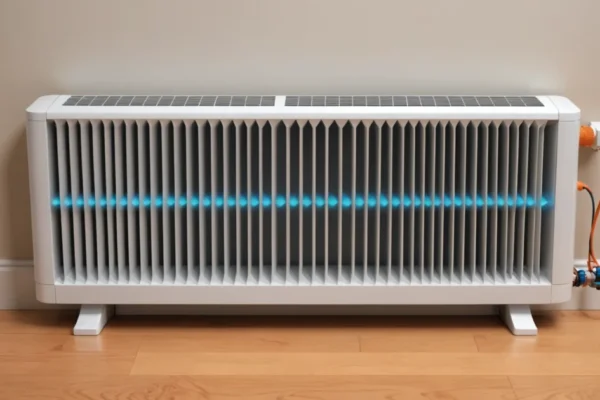
A vacuum cleaner with brush and crevice attachments forms the foundation of effective baseboard heater maintenance. Brush attachments gently dislodge dust from heating fins without bending delicate metal components. Additionally, crevice tools reach narrow spaces between fins where debris typically accumulates most heavily.
Soft-bristled cleaning brushes or old toothbrushes provide precision cleaning for stubborn deposits that vacuum suction cannot remove. These tools navigate tight spaces around heating elements while maintaining gentle pressure on sensitive surfaces. Furthermore, natural bristles prove less likely to create static electricity that attracts additional dust particles.
Microfiber cloths and cleaning rags capture fine dust particles through electrostatic attraction rather than simply moving debris around. Professional cleaners prefer microfiber because it traps allergens and microscopic particles that cotton rags often miss. Similarly, lint-free cloths prevent fiber residue from accumulating on clean heating surfaces.
Cleaning Solutions and Specialized Tools
Mild detergent or white vinegar solutions effectively dissolve grease and grime without damaging heating element coatings. White vinegar naturally neutralizes odors while providing antimicrobial properties that eliminate bacteria and mold spores. However, harsh chemical cleaners can corrode metal components and void manufacturer warranties.
Compressed air canisters offer exceptional effectiveness for removing dust from inaccessible areas behind heating fins. Professional maintenance technicians consider compressed air essential for thorough cleaning because it reaches spaces that brushes and vacuum attachments cannot access. Nevertheless, proper technique prevents debris from becoming airborne and settling elsewhere in the room.
A screwdriver set enables removal of protective covers when deep cleaning becomes necessary. Phillips head and flathead screwdrivers accommodate different cover attachment methods across various baseboard heater models. Consequently, cover removal allows complete access to internal components for comprehensive maintenance.
Professional Tip
Tool Organization and Safety Considerations
Organizing cleaning supplies in a portable caddy streamlines the maintenance process and prevents tool misplacement during multi-room cleaning sessions. Professional cleaning services emphasize systematic tool arrangement because proper maintenance practices reduce both cleaning time and potential equipment damage. Additionally, having all necessary tools readily available prevents interruptions that could compromise cleaning thoroughness.
Quality tools justify their cost through improved cleaning results and extended equipment lifespan. Cheap brushes shed bristles that can clog heating fins, while inadequate vacuum attachments fail to remove embedded debris effectively. Therefore, investing in appropriate cleaning equipment prevents future maintenance complications and ensures optimal heating system performance.
Step-by-Step Cleaning Process for Electric Baseboard Heaters
Systematic cleaning procedures ensure electric baseboard heaters operate efficiently while maintaining optimal heat distribution throughout your home. Furthermore, following proper cleaning sequences prevents damage to delicate heating elements and extends equipment lifespan significantly.
Initial Dust Removal with Vacuum Attachment
Vacuum brush attachments effectively remove loose dust and debris from heating fins without applying excessive pressure that could bend delicate components. Start cleaning from the top of each unit and work systematically downward to prevent redistributing dust onto already-cleaned surfaces. Additionally, use gentle sweeping motions rather than aggressive scrubbing to protect the heating element integrity.
Professional maintenance technicians recommend soft-bristled vacuum attachments because they capture dust particles without scratching painted surfaces or damaging protective coatings. Moreover, vacuum cleaning removes approximately 70% of accumulated debris during this initial cleaning phase.
Detailed Fin Cleaning with Soft Brushes
Heating element fins require careful attention because dust accumulation between these components significantly reduces heat transfer efficiency. Use a soft-bristled brush to gently clean between individual fins, working in the same direction as the fin orientation to avoid bending or damage. Consequently, this detailed cleaning process restores proper airflow patterns essential for optimal heating performance.
Brush cleaning techniques vary depending on fin spacing and debris accumulation levels. Therefore, inspect each section thoroughly and adjust cleaning intensity accordingly to ensure complete dust removal without component damage.
Exterior Surface Maintenance
Exterior surfaces accumulate dust, pet hair, and household debris that affects both appearance and heating efficiency. Wipe down all external components using a slightly damp cloth with mild soap solution to remove stubborn stains and accumulated grime. However, ensure the cloth remains only slightly moist to prevent water infiltration into electrical components.
Pay special attention to air intake areas where dust accumulation creates visible buildup that restricts proper airflow. Additionally, clean exterior surfaces enhance heat radiation while maintaining the aesthetic appeal of your heating system.
Compressed Air Deep Cleaning
Compressed air cleaning removes stubborn debris lodged deep within heating fins that vacuum attachments and brushes cannot reach effectively. Direct short air bursts at specific angles to dislodge embedded particles without forcing debris further into the unit. Furthermore, this cleaning method proves particularly effective for removing pet hair and lint that accumulates in hard-to-reach spaces.
Professional cleaning services emphasize proper compressed air technique because incorrect application can redistribute debris throughout the room or damage delicate heating components. Therefore, maintain appropriate distance and pressure settings to ensure safe and effective cleaning results.
Air Intake and Outlet Area Restoration
Air intake and outlet areas require thorough cleaning because restricted airflow reduces heating efficiency by up to 25% according to HVAC maintenance studies. Remove protective covers when necessary to access internal components that accumulate significant debris over time. Subsequently, clean or replace any removable filters that may be present in your specific heater model.
Intake area cleaning involves removing accumulated lint, dust, and household debris that creates airflow restrictions. Meanwhile, outlet areas require attention to ensure proper heat distribution patterns remain unobstructed throughout your living space.
Final Assembly and Performance Testing
Reassembly procedures must follow reverse disassembly steps to ensure proper component alignment and secure attachment of all protective covers. Check that all screws are properly tightened and covers fit flush against the unit to maintain safety standards and optimal performance.
Performance testing confirms successful cleaning completion and identifies any issues requiring additional attention. Turn on the heater and monitor for unusual noises, odors, or heating irregularities that might indicate incomplete cleaning or component damage. Consequently, proper testing ensures your baseboard heater operates safely and efficiently after maintenance completion.
Professional Tip
Cleaning Hydronic (Hot Water) Baseboard Heaters
Hydronic baseboard heaters require different cleaning approaches compared to electric models because they use hot water circulation instead of electrical heating elements. These systems feature water pipes, connection joints, and specialized fin configurations that demand careful attention during maintenance procedures. Furthermore, hydronic systems present unique challenges including potential leak detection and corrosion prevention that electric heaters do not encounter.
Key Differences from Electric Heater Cleaning
Water-based heating systems operate at lower surface temperatures than electric models, allowing for more aggressive cleaning techniques without component damage risks. However, hydronic heaters contain pressurized water lines that require extra caution during cleaning procedures. Additionally, these systems often feature more complex fin arrangements designed to maximize heat transfer from circulating hot water.
Cleaning frequency differs between system types because hydronic heaters accumulate debris more slowly due to reduced air circulation patterns. Nevertheless, proper maintenance remains essential for optimal heat distribution and energy efficiency throughout your home’s heating season.
Focus on Fin Cleaning for Optimal Heat Transfer
Fin cleaning represents the most critical maintenance task for hydronic baseboard heaters because heat transfer efficiency depends entirely on clean metal surfaces. Use a fin comb or specialized baseboard heater cleaning brush to straighten bent fins while removing accumulated dust and debris. Moreover, damaged or severely bent fins reduce heating capacity by up to 30% according to heating system performance studies.
Work systematically from one end of the heater to the other, ensuring each fin receives thorough attention during the cleaning process. Subsequently, inspect fin spacing and alignment to identify areas requiring additional straightening or repair work for maximum heat transfer performance.
Professional Tip
Cleaning Around Water Pipes and Connections
Water pipe cleaning requires gentle techniques to avoid disturbing connection joints or damaging pipe insulation materials. Use soft-bristled brushes and avoid applying excessive pressure near pipe connections, valves, and fittings that could loosen over time. Additionally, clean around pipe mounting brackets and support structures that often collect significant dust accumulation.
Pay special attention to areas where pipes enter and exit the baseboard unit because these locations frequently trap debris and restrict proper airflow patterns. Consequently, thorough cleaning of these transition zones ensures optimal heat distribution throughout the entire heating system.
Checking for Leaks or Corrosion During Cleaning
Leak detection becomes an essential part of hydronic heater cleaning because water damage can occur gradually without obvious warning signs. Inspect all pipe joints, valve connections, and mounting points for moisture, mineral deposits, or rust stains that indicate potential leak sources. Furthermore, examine the area beneath and around the heater for water damage or discoloration patterns.
Corrosion inspection involves checking metal components for rust, pitting, or deterioration that could compromise system integrity. Look for white or green mineral deposits around connections that signal slow leaks requiring immediate attention from heating professionals.
- Check pipe joints for moisture or mineral buildup
- Inspect mounting brackets for rust or corrosion
- Look for water stains on walls or flooring
- Examine valve stems and packing nuts for leaks
- Test pipe connections for looseness or movement
Special Considerations for Older Hydronic Systems
Older hydronic systems often feature cast iron or steel components that require more delicate handling during cleaning procedures. These materials become brittle over time and may crack or break under excessive pressure or aggressive cleaning techniques. Therefore, use gentle cleaning methods and avoid impact tools that could damage aging system components.
Vintage systems frequently contain asbestos insulation materials that require professional handling and should never be disturbed during routine cleaning procedures. Additionally, older pipe connections may use different materials and sealing compounds that become fragile with age and temperature cycling.
Consider professional inspection for systems over 20 years old because they may require specialized maintenance techniques or component replacements beyond standard cleaning procedures. Meanwhile, document any unusual sounds, odors, or performance changes that could indicate underlying system problems requiring professional attention.
Removing and Cleaning Baseboard Heater Covers
Baseboard heater covers require removal for thorough cleaning when dust accumulation becomes excessive or when performing annual maintenance. However, many cleaning tasks can be accomplished without removing covers entirely. Cover removal becomes necessary when dust buildup blocks more than 30% of the fins or when odors persist after surface cleaning.
Determine whether removal is required by examining the interior through the cover openings. Additionally, covers should come off when repainting walls, replacing heating elements, or addressing unusual noises from within the unit.
When Cover Removal Is Necessary vs. Cleaning in Place
In-place cleaning works effectively for routine maintenance when dust accumulation remains minimal and no mechanical issues exist. Use a vacuum with brush attachment to remove surface debris through cover openings. Furthermore, compressed air cleaning can dislodge moderate dust buildup without disassembly.
Complete cover removal becomes essential when pet hair creates dense mats around heating elements or when cooking grease has accumulated on interior surfaces. Similarly, remove covers when strange odors emanate from the unit or when visible corrosion appears on accessible metal components.
- Surface dust and light debris: clean in place
- Heavy dust accumulation: remove covers
- Pet hair matting: requires removal
- Grease or sticky residue: full disassembly needed
- Odor issues: remove for thorough cleaning
How to Safely Remove Different Types of Covers
Snap-on covers represent the most common type and typically feature plastic clips along the bottom edge. Gently lift the front edge while supporting the cover weight to prevent bending or breaking the mounting tabs. Moreover, some units require lifting straight up before pulling forward to disengage rear mounting hooks.
Screw-mounted covers attach with visible screws along the front face or hidden fasteners behind decorative caps. Remove all visible screws before attempting to lift the cover, and check for additional mounting points at the ends. Consequently, keep screws organized in a small container to prevent loss during cleaning.
Older units may feature slide-in covers that require lifting and pulling simultaneously. These covers often have metal tabs that engage slots in the heater housing. Test different lifting angles gently until the cover releases without forcing.
Safety First
Thorough Washing Techniques for Removable Covers
Removable covers benefit from complete washing in warm, soapy water using mild dish detergent. Fill a large sink or bathtub with warm water and add a few drops of grease-cutting dish soap. Subsequently, allow covers to soak for 15-20 minutes to loosen stubborn dirt and grease deposits.
Use a soft-bristled brush or sponge to scrub all surfaces, paying special attention to louver openings where dust accumulates. Avoid abrasive cleaners or steel wool that could scratch painted surfaces or damage decorative finishes. Instead, use an old toothbrush to reach tight spaces and detailed areas.
For heavily soiled covers, create a cleaning solution with white vinegar and warm water in equal parts. This natural cleaner effectively removes mineral deposits and neutralizes odors without harsh chemicals. Rinse thoroughly with clean water after scrubbing to remove all soap residue.
Cleaning Painted vs. Unpainted Metal Covers
Painted metal covers require gentler treatment to preserve the finish and prevent chipping or peeling. Use only mild soap solutions and soft cleaning tools to avoid scratching the paint surface. Additionally, test any cleaning product on an inconspicuous area first to ensure compatibility with the paint type.
Unpainted metal covers can withstand more aggressive cleaning methods, including mild abrasive cleaners for stubborn stains. However, dry these covers thoroughly immediately after washing to prevent rust formation. Apply a thin coat of metal protectant or light oil to raw steel surfaces if recommended by the manufacturer.
| Cover Type | Cleaning Method | Products to Avoid |
|---|---|---|
| Painted Metal | Mild soap, soft brush | Abrasives, harsh chemicals |
| Raw Steel | Soap, light abrasives OK | Bleach, strong acids |
| Aluminum | Gentle soap, soft cloth | Steel wool, ammonia |
| Plastic/Vinyl | Warm soap water | Acetone, strong solvents |
Proper Drying and Reinstallation Procedures
Complete drying prevents rust formation and ensures proper fit during reinstallation. Shake off excess water and use clean towels to remove surface moisture from all areas. Place covers in a well-ventilated area or outdoors in shade to air dry completely.
Inspect covers thoroughly while drying for any damage, loose parts, or wear that occurred during cleaning. Check mounting tabs for cracks and ensure all moving parts operate smoothly. Meanwhile, clean the heater housing and surrounding area while covers dry.
Reinstall covers by reversing the removal process, ensuring all mounting points engage properly. Test the fit by gently pulling on the cover to verify secure attachment. Finally, restore power and test heater operation to confirm proper installation and function.
Document the cleaning date and any issues discovered for future reference. This maintenance record helps establish cleaning schedules and identifies patterns that may indicate underlying system problems requiring professional attention.
Addressing Common Cleaning Challenges
Real-world baseboard heater cleaning presents several persistent challenges that require specific techniques and tools. Pet owners face the most stubborn debris removal issues, while homeowners in dusty environments battle years of accumulated grime. Additionally, tight installation spaces and damaged components complicate standard cleaning procedures.
Removing Pet Hair and Stubborn Debris from Fins
Pet hair creates the most challenging cleaning scenario for baseboard heaters. Hair wraps around fins and embeds deep within the heating elements, reducing airflow efficiency by up to 40%. Furthermore, this organic material burns when heated, creating unpleasant odors and potential fire hazards.
Start pet hair removal using a vacuum cleaner with crevice attachment to extract loose debris from accessible areas. Next, employ needle-nose pliers to carefully grip and pull wrapped hair from individual fins. Compressed air proves invaluable for dislodging hair from deep recesses where manual tools cannot reach.
For extremely stubborn pet hair, apply a dryer sheet to reduce static electricity that attracts hair to metal surfaces. Consequently, this technique makes subsequent cleaning sessions significantly easier. Professional cleaning services often use specialized baseboard heater cleaning brushes designed specifically for this challenge.
Dealing with Years of Accumulated Dust and Grime
Long-neglected heaters develop thick layers of dust mixed with cooking grease, tobacco residue, and airborne particles. This combination creates a cement-like coating that resists standard cleaning methods. Moreover, accumulated grime reduces heat transfer efficiency and creates fire safety concerns.
Begin deep cleaning with a degreasing solution containing warm water and dish soap to break down oily residues. Allow the solution to penetrate for 15-20 minutes before scrubbing with soft-bristled brushes. Multiple cleaning cycles may be necessary to remove years of buildup completely.
Vinegar-based solutions excel at dissolving mineral deposits and stubborn grime without damaging metal components. However, avoid using abrasive cleaners or steel wool on painted surfaces, as these damage protective coatings and promote rust formation.
Cleaning Heaters in Tight Spaces or Behind Furniture
Space constraints present significant obstacles when cleaning baseboard heaters installed behind heavy furniture or in narrow alcoves. Standard cleaning tools often cannot reach critical areas, leaving debris trapped in heating elements. Additionally, moving furniture risks damage to both the heater and surrounding surfaces.
Flexible cleaning wands and telescoping brushes provide solutions for accessing confined spaces without furniture relocation. These specialized tools bend and extend to reach areas up to three feet behind obstacles. Similarly, compressed air with extension nozzles effectively removes debris from inaccessible locations.
Consider professional cleaning services for severely constrained installations, especially in commercial settings. Technicians possess specialized equipment including flexible vacuum systems and articulating cleaning tools designed for tight-space maintenance. This investment prevents costly repairs from inadequate cleaning in challenging locations.
Handling Bent or Damaged Fins During Cleaning
Damaged fins significantly reduce heating efficiency and complicate cleaning procedures. Bent metal creates debris traps and restricts airflow through the heating element. Unfortunately, aggressive cleaning attempts often worsen existing damage, requiring professional repair or component replacement.
Use fin combs specifically designed for straightening bent heating fins before beginning deep cleaning. These tools gently reshape damaged areas without creating stress fractures in the metal. Work slowly and apply minimal pressure to avoid breaking fragile components.
Document all damage with photographs before attempting repairs, as extensive fin damage may indicate underlying system problems. Professional assessment becomes necessary when more than 20% of fins show significant damage. Meanwhile, clean around damaged areas carefully to prevent further deterioration during maintenance.
Eliminating Persistent Odors from Heating Elements
Persistent odors from baseboard heaters typically result from burned organic matter, mold growth, or chemical residues trapped in heating elements. These smells intensify when heaters operate, creating uncomfortable indoor environments and potential health concerns. Standard cleaning may not eliminate deeply embedded odor sources.
Begin odor elimination by identifying the source through visual inspection of heating elements. Look for discolored areas, organic debris, or signs of moisture damage that contribute to smell problems. Subsequently, apply enzyme-based cleaners that break down organic compounds causing persistent odors.
For severe odor issues, consider professional maintenance services that use ozone treatment or specialized deodorizing equipment. These methods penetrate deep into heating elements to neutralize odor molecules that surface cleaning cannot reach. Additionally, ensure proper ventilation during and after cleaning to prevent odor recurrence.
Safety Warning
Professional vs. DIY Cleaning: When to Call Experts
Deciding between professional and DIY baseboard heater cleaning depends on several critical factors that affect both safety and effectiveness. While routine maintenance typically suits DIY approaches, certain situations demand professional expertise to prevent damage or safety hazards. Understanding these distinctions helps homeowners make informed decisions about their heating system maintenance.
Signs That Indicate Need for Professional Service
Electrical issues represent the most critical indicator requiring professional intervention. Flickering lights when heaters operate, unusual electrical smells, or visible sparking around heating elements demand immediate expert attention. These symptoms suggest wiring problems that pose serious fire risks.
Additionally, extensive fin damage covering more than 20% of heating elements requires professional assessment. Severely corroded components, persistent odors despite thorough cleaning, or heating elements that fail to warm properly indicate underlying system problems beyond DIY repair capabilities.
- Electrical burning smells or visible sparking
- Heating elements that remain cold despite power
- Excessive noise during operation cycles
- Visible corrosion on internal components
- Water damage or moisture accumulation inside units
Cost Comparison of DIY vs. Professional Cleaning
| Service Type | DIY Cost | Professional Cost | Time Investment |
|---|---|---|---|
| Basic cleaning supplies | $15-30 | Included in service | 2-4 hours |
| Single room cleaning | $5-10 materials | $75-150 | 1-2 hours |
| Whole house service | $25-50 materials | $200-400 | 6-8 hours |
| Deep cleaning with repairs | $50-100+ parts | $300-600 | 8-12 hours |
Professional services typically cost $75-150 per room but include specialized equipment, expertise, and liability coverage. Meanwhile, DIY cleaning requires minimal material costs but demands significant time investment and carries risks of damage or injury. Furthermore, professional cleaning often identifies potential problems before they become expensive repairs.
What Professional Cleaning Services Typically Include
Professional baseboard heater cleaning encompasses comprehensive services beyond basic DIY maintenance. Certified technicians perform electrical safety inspections, deep component cleaning, and system performance testing during service visits. These services ensure optimal heating efficiency and identify potential safety hazards.
Moreover, professional cleaning includes specialized equipment such as industrial vacuum systems, compressed air tools, and electronic testing devices. Technicians also provide detailed inspection reports documenting system condition and recommending preventive maintenance schedules.
- Complete electrical safety inspection and testing
- Professional-grade vacuum and compressed air cleaning
- Fin straightening and component repair services
- System performance testing and efficiency analysis
- Detailed inspection reports with maintenance recommendations
- Warranty coverage on cleaning work performed
Finding Qualified Baseboard Heater Cleaning Services
Locating qualified professionals requires research into HVAC contractors with specific baseboard heater experience. Licensed electricians also provide cleaning services since these systems involve electrical components requiring specialized knowledge. Always verify licensing, insurance coverage, and customer references before hiring any service provider.
Search for contractors through professional associations like the Air Conditioning Contractors of America, which maintains directories of certified technicians. Additionally, request detailed quotes comparing service scope, pricing, and warranty terms from multiple providers before making decisions.
Verification Checklist
Situations Where DIY Cleaning May Void Warranties
Manufacturer warranties often specify professional maintenance requirements that void coverage if homeowners perform unauthorized repairs or modifications. Opening sealed electrical components, using improper cleaning chemicals, or attempting electrical repairs typically violates warranty terms. Therefore, review warranty documentation carefully before undertaking any DIY maintenance.
Rental properties present additional complications where home maintenance mistakes can affect lease agreements or insurance coverage. Tenants should consult property managers before cleaning heating systems to avoid liability issues or lease violations.
Furthermore, insurance policies may require professional maintenance documentation for claims related to heating system failures or fires. Consequently, maintaining professional service records protects homeowners from potential coverage denials during insurance claims processes.
Maintenance Schedule and Seasonal Preparation
Establishing a consistent maintenance schedule ensures baseboard heaters operate efficiently throughout their lifespan. Most manufacturers recommend twice-yearly cleaning as the optimal frequency for residential units. However, homes with pets, high dust levels, or frequent cooking may require more frequent attention.
Professional HVAC technicians suggest scheduling major cleanings during spring and fall transitions. This timing allows homeowners to address accumulated debris before and after peak heating seasons. Additionally, monthly visual inspections during active heating periods help identify problems before they escalate into costly repairs.
Pre-Heating Season Preparation Checklist
Before cold weather arrives, thorough preparation maximizes heating system performance and prevents unexpected breakdowns. Start preparations in early October for most temperate climates, allowing sufficient time to address any discovered issues.
- Remove all accumulated summer dust from fins and housing using vacuum attachments
- Check electrical connections for corrosion, loose wires, or damaged insulation
- Test thermostat operation by cycling through different temperature settings
- Inspect heating elements for visible damage, discoloration, or mineral deposits
- Clear furniture, curtains, and storage items from heater vicinity
- Verify proper airflow by checking for obstructed intake and exhaust areas
- Replace any damaged heater covers or protective grilles
- Document baseline performance measurements for comparison throughout the season
Professional inspection becomes particularly important for units over ten years old or those showing signs of reduced efficiency. Furthermore, homes experiencing extreme cold weather conditions benefit from comprehensive system evaluations before peak demand periods.
End-of-Season Maintenance and Storage Tips
Spring maintenance focuses on protecting heating systems during inactive months while preparing for the next heating season. Complete end-of-season tasks by late April in most regions, after consistent warm weather eliminates heating needs.
Begin by performing a final thorough cleaning to remove all accumulated debris from the heating season. Next, apply protective treatments to metal components to prevent corrosion during humid summer months. Document any wear patterns or performance issues observed during the season for future reference.
- Turn off power at the circuit breaker and allow complete cooling
- Perform comprehensive cleaning using appropriate tools and techniques
- Apply light coating of protective lubricant to moving parts
- Cover units with breathable fabric covers to prevent dust accumulation
- Schedule professional inspection for any units showing performance degradation
- Update maintenance logs with cleaning dates and observed conditions
Monthly Inspection Points During Heating Season
Regular monthly inspections during active heating periods help identify developing problems before they cause system failures. Dedicate 15-20 minutes monthly to systematic visual and performance assessments of each heating unit.
| Inspection Area | What to Check | Warning Signs |
|---|---|---|
| Heating Elements | Visual condition and color | Dark spots, warping, or white deposits |
| Air Circulation | Warm air output and flow | Reduced airflow or cold spots |
| Electrical Connections | Secure wiring and connections | Loose wires or burn marks |
| Housing Condition | Structural integrity and cleanliness | Cracks, excessive dust, or damage |
| Thermostat Response | Temperature control accuracy | Delayed response or erratic cycling |
Document findings in a maintenance log to track performance trends over time. Patterns of declining efficiency often emerge gradually, making detailed records valuable for identifying optimal replacement timing.
Signs That Indicate Immediate Cleaning Is Needed
Certain symptoms indicate immediate cleaning requirements regardless of scheduled maintenance intervals. Recognizing these warning signs prevents damage and maintains safe operation throughout the heating season.
Burning odors represent the most critical warning sign requiring immediate attention. These smells typically indicate dust accumulation on heating elements or potential electrical problems. Similarly, unusual noises such as clicking, buzzing, or rattling suggest mechanical issues requiring prompt investigation.
Emergency Cleaning Indicators
Reduced heating efficiency manifests as longer warm-up times, uneven room temperatures, or increased energy bills without corresponding usage changes. Additionally, visible dust clouds when units first activate indicate heavy debris accumulation requiring immediate cleaning.
Pet owners should watch for excessive hair accumulation around intake areas, which can block airflow and cause overheating. Meanwhile, households with allergies may notice increased symptoms when heating systems operate, suggesting accumulated allergens require removal.
Troubleshooting Post-Cleaning Issues
Even careful cleaning procedures can occasionally result in operational problems requiring immediate attention. Understanding common post-cleaning issues helps homeowners identify problems quickly and determine appropriate solutions. Most complications arise from improper reassembly, disturbed electrical connections, or cleaning residue affecting system components.
What to Do If Heater Doesn't Work After Cleaning
Non-functioning heaters after cleaning typically indicate electrical connection problems or safety switch activation. First, verify the circuit breaker remains in the “on” position, as cleaning vibrations sometimes trip breakers. Additionally, check that all electrical connections remain secure and properly seated in their terminals.
Safety switches often activate when moisture enters electrical components during cleaning. Allow 24 hours of drying time before attempting to restart the system. Furthermore, inspect the thermostat settings to ensure cleaning activities didn’t accidentally adjust temperature controls or switch positions.
If the unit still fails to operate, examine the heating elements for visible damage or loose connections. Bent fins or damaged elements require professional replacement to restore proper function. Meanwhile, units with multiple zones should be tested individually to isolate specific problem areas.
Addressing Unusual Noises or Smells After Cleaning
Burning odors immediately after cleaning usually indicate cleaning residue on heating elements. Turn off the system and allow complete cooling before inspecting for soap residue, cleaning solution deposits, or lint particles on hot surfaces. These contaminants burn off during initial heating cycles, creating temporary but concerning odors.
Clicking or buzzing sounds often result from loose electrical connections disturbed during cleaning. However, rattling noises typically indicate displaced components or debris lodged in fan assemblies. Consequently, systematic inspection of all moveable parts helps identify the noise source.
Safety Alert
Metallic odors suggest cleaning solution reactions with aluminum fins or copper components. Thoroughly rinse all surfaces with clean water to remove chemical residues. Similarly, musty smells indicate trapped moisture requiring extended drying time before system restart.
Checking Electrical Connections and Safety Switches
Post-cleaning electrical inspection prevents dangerous malfunctions and ensures reliable operation. Begin by turning off power at both the unit switch and circuit breaker before examining any electrical components. Moreover, use a voltage tester to confirm power disconnection before touching wires or terminals.
- Wire terminals: Ensure tight connections without exposed copper
- Safety switches: Verify proper positioning and clean contacts
- Thermostat wiring: Check for loose or corroded connections
- Ground wires: Confirm secure attachment to unit chassis
Safety switches protect against overheating and electrical faults during normal operation. These devices sometimes activate during cleaning if moisture enters switch housings or mechanical components shift position. Reset switches according to manufacturer instructions only after confirming dry conditions.
Corroded connections require immediate attention to prevent arcing or component failure. Clean corrosion with fine sandpaper and apply dielectric grease to prevent future oxidation. However, severely damaged wiring necessitates professional replacement to maintain safety standards.
When to Contact HVAC Professionals for Assistance
Professional intervention becomes necessary when troubleshooting efforts fail to resolve operational problems. Electrical issues, refrigerant leaks, or damaged heating elements require specialized knowledge and tools beyond typical homeowner capabilities. Additionally, warranty considerations often mandate professional service for covered repairs.
Contact professionals immediately if cleaning reveals significant component damage, such as cracked heat exchangers, damaged electrical panels, or corroded gas connections. Furthermore, systems that repeatedly trip safety switches or circuit breakers indicate underlying problems requiring expert diagnosis.
Units older than 15 years may benefit from professional evaluation during cleaning-related service calls. Technicians can assess overall system condition and recommend maintenance strategies to extend operational life. Similarly, homes with multiple heating zones often require professional balancing after extensive cleaning procedures.
Emergency situations requiring immediate professional response include gas odors, electrical sparking, or smoke production from heating units. These conditions pose serious safety risks that demand expert intervention regardless of cleaning activities. Meanwhile, proper maintenance practices help prevent many issues that require professional correction.
Common Mistakes That Can Damage Heaters During Cleaning
Preventable damage often results from well-intentioned but improper cleaning techniques. Understanding these common mistakes helps homeowners avoid costly repairs and maintain system reliability throughout the cleaning process.
Excessive water usage represents the most frequent cause of post-cleaning problems. Water infiltration into electrical components causes short circuits, corrosion, and safety switch activation. Therefore, use minimal moisture and ensure complete drying before system restart.
- Aggressive scrubbing: Damages delicate aluminum fins and coil surfaces
- Wrong cleaning products: Acidic or caustic cleaners corrode metal components
- Forced component removal: Breaks clips, brackets, and mounting hardware
- Inadequate drying time: Causes electrical problems and corrosion
High-pressure cleaning methods bend heating fins and damage electrical connections. Compressed air should be used at low pressure settings to prevent component damage. Similarly, power washing or steam cleaning introduces excessive moisture that penetrates electrical assemblies.
Reassembly errors create operational problems and safety hazards after cleaning completion. Document component positions before disassembly and follow manufacturer specifications for proper installation. Moreover, ensure all safety covers and protective panels are correctly positioned before energizing the system.
Chemical residue from inappropriate cleaning products continues causing problems long after cleaning completion. Household cleaners containing ammonia, bleach, or acids damage metal surfaces and create toxic fumes when heated. Consequently, use only manufacturer-approved cleaning solutions or mild soap and water for safe results.
Frequently Asked Questions
What is the best way to clean baseboard heaters?
The best way to clean baseboard heaters involves turning off power first, waiting 30+ minutes for cooling, then using a vacuum with brush attachment to remove dust from heating elements. Follow up with a soft-bristled brush for stubborn debris and compressed air to blow out remaining particles. Use microfiber cloths for the exterior covers and ensure all components are completely dry before restoring power.
Do you have to clean baseboard heaters?
Yes, cleaning baseboard heaters is essential for safety and efficiency. Dust accumulation creates fire hazards when it builds up on heating elements and can ignite during operation. Additionally, dirty heaters operate 15-25% less efficiently, leading to higher energy costs and reduced heating performance throughout your home.
How often should I clean my baseboard heaters?
Clean baseboard heaters twice yearly – once before the heating season begins and once after it ends. This schedule prevents dust buildup during dormant summer months and ensures optimal performance when you need heat most. Homes with pets or high dust levels may require more frequent cleaning every 3-4 months.
How to get rid of smell from baseboard heater?
The burning smell from baseboard heaters comes from accumulated dust burning off when units first activate. To eliminate this odor, clean your heaters thoroughly before the heating season using a vacuum and brush to remove all dust and debris. If the smell persists after cleaning, check for damaged components or contact a professional for inspection.
What tools do I need to clean baseboard heaters?
- Vacuum cleaner with brush attachment
- Soft-bristled brush or old toothbrush
- Microfiber cloths for wiping surfaces
- Compressed air for blowing out debris
- Screwdriver for removing covers if needed
- Flashlight for better visibility
Can I use vinegar to clean baseboard heaters?
Avoid using vinegar or liquid cleaners on baseboard heater elements, as moisture can damage electrical components and create safety hazards. Instead, use dry cleaning methods like vacuuming and brushing. You can use a slightly damp microfiber cloth on exterior covers only, ensuring they’re completely dry before reassembly.
Is it safe to clean baseboard heaters myself?
DIY baseboard heater cleaning is safe when proper precautions are followed. Always turn off power at the circuit breaker, wait for complete cooling, and avoid using liquids near electrical components. However, call professionals if you notice damaged fins, electrical issues, loose connections, or if heaters don’t function properly after cleaning.
What's the difference between cleaning electric and hydronic baseboard heaters?
Electric baseboard heaters require careful attention to heating elements and electrical components, using only dry cleaning methods. Hydronic systems contain hot water pipes and may have different cover designs, but both types benefit from the same basic cleaning approach: vacuuming, brushing, and ensuring proper airflow around all components.
Should I hire professional baseboard heater cleaning services?
Consider professional cleaning services if you have multiple units throughout your home, lack time for regular maintenance, or notice performance issues after DIY cleaning. Professional services typically cost $75-150 per unit but include thorough inspection, specialized tools, and warranty coverage. They’re especially valuable for older systems or homes with accessibility challenges.
How do I know if my baseboard heater needs cleaning?
- Visible dust accumulation on heating elements or covers
- Burning smell when heater first turns on
- Reduced heating efficiency or longer warm-up times
- Unusual noises during operation
- Discolored or dirty covers
- Poor air circulation around the unit
Can dirty baseboard heaters cause health problems?
Yes, dirty baseboard heaters can negatively impact indoor air quality by circulating dust, pet dander, and allergens throughout your home. This is particularly problematic for individuals with respiratory sensitivities, asthma, or allergies. Regular cleaning prevents these particles from being distributed through convection currents when heaters operate.
What are baseboard heater covers and do they help with cleaning?
Baseboard heater covers are decorative and protective enclosures that can make cleaning easier by providing removable access panels. Quality covers improve aesthetics while allowing proper airflow and simplifying maintenance access. However, covers themselves require regular cleaning to prevent dust accumulation that could restrict airflow.
How much money can I save by cleaning my baseboard heaters regularly?
Regular baseboard heater cleaning can reduce energy costs by 15-25% compared to neglected units. For an average home spending $1,200 annually on heating, this translates to $180-300 in yearly savings. Additionally, proper maintenance extends heater lifespan by 20-30%, preventing costly premature replacements that can cost $200-500 per unit.
You May Also Like
Can Baseboard Heaters Cause Fires? Safety Facts & Prevention

How to Baby Proof Baseboard Heaters: Complete Safety Guide