How Much Solar Power Do I Need for My RV? Complete Guide
How much solar power do I need for my RV depends on your daily energy consumption, which typically ranges from 200-400 watts for weekend camping to 1200+ watts for full-time living with air conditioning. Most RVers need between 400-800 watts of solar panels for comfortable extended trips, while boondockers running high-consumption appliances require larger systems.
Determining your RV’s solar requirements starts with calculating your daily energy usage in watt-hours. Additionally, you’ll need to consider your RV type, camping style, and geographic location to size your system properly.
The most common configurations include 200-400 watt starter systems for light usage, 800 watt systems for moderate to heavy power needs, and 1200+ watt systems for full-time living. Furthermore, your battery bank capacity, charge controller, and inverter must match your solar panel output for optimal performance.
TL;DR
- Weekend camping: 200-400 watts sufficient for basic needs (lights, water pump, phone charging)
- Extended trips: 400-800 watts needed for refrigeration, electronics, and moderate appliance use
- Full-time living: 800-1200+ watts required, especially when running AC or high-consumption devices
- System sizing: Calculate daily watt-hour consumption, then multiply by 1.3-1.5 for safety margin
- Battery pairing: Match battery bank capacity to provide 2-3 days of autonomy without sun
Understanding Your RV’s Power Consumption
Calculating your daily energy usage in watt-hours forms the foundation of proper solar system sizing. Most RVers consume between 2,000-6,000 watt-hours daily, depending on their appliances and lifestyle. Therefore, accurate power consumption measurement prevents costly oversizing or frustrating undersized systems.
Your energy audit begins with listing every electrical device in your RV. Additionally, you’ll multiply each appliance’s wattage by its daily usage hours to determine individual consumption. For example, LED lights drawing 10 watts used for 5 hours consume 50 watt-hours daily.
High-Consumption Appliances That Drive System Size
Air conditioning units represent the largest power consumers in most RVs, drawing 1,000-1,500 watts during operation. Similarly, residential refrigerators consume 150-400 watts continuously, accumulating 3,600-9,600 watt-hours daily. Microwaves, though used briefly, pull 800-1,200 watts during cooking cycles.
| Appliance | Typical Wattage | Daily Usage | Daily Watt-Hours |
|---|---|---|---|
| RV Air Conditioner | 1,200W | 8 hours | 9,600 Wh |
| Residential Refrigerator | 200W | 18 hours | 3,600 Wh |
| Microwave | 1,000W | 0.5 hours | 500 Wh |
| Water Heater | 1,400W | 2 hours | 2,800 Wh |
| Hair Dryer | 1,800W | 0.25 hours | 450 Wh |
Electric water heaters consume 1,400 watts when heating, cycling on and off throughout the day. Furthermore, induction cooktops draw 1,200-1,800 watts during meal preparation, making propane alternatives more solar-friendly for extended boondocking.
Measuring Actual vs. Rated Power Draw
Rated consumption often differs significantly from actual power draw under real-world conditions. Consequently, using a kill-a-watt meter or similar device provides accurate measurements of your specific appliances. Many refrigerators rated at 300 watts actually consume 150-200 watts due to modern efficiency improvements.
Inverter efficiency also affects actual consumption calculations. Most inverters operate at 85-95% efficiency, meaning a 100-watt AC load requires 105-118 watts from your battery bank. Therefore, factor this loss into your daily consumption totals for accurate system sizing.
Pro Tip
Seasonal Usage Variations
Summer camping dramatically increases power consumption due to air conditioning and fan usage. Additionally, shorter daylight hours in winter reduce solar generation while heating systems increase electrical demands. Winter consumption can exceed summer usage by 30-50% in northern climates.
Spring and fall represent optimal seasons for solar RVing, with moderate temperatures reducing HVAC loads. Moreover, these seasons provide 8-10 hours of quality sunlight for solar generation without extreme heat affecting panel efficiency.
- Summer: High AC usage, maximum solar production
- Winter: Reduced generation, increased heating loads
- Spring/Fall: Optimal balance of generation and consumption
- Regional variations: Desert southwest vs. Pacific northwest
Phantom Loads and Standby Power
Phantom loads consume power continuously, even when appliances appear off. These invisible drains include propane detectors, CO detectors, stereo displays, and charging stations. Typically, phantom loads total 200-500 watt-hours daily in modern RVs.
Inverters themselves consume 5-20 watts in standby mode, accumulating 120-480 watt-hours daily if left on continuously. Similarly, residential refrigerators maintain control boards and displays that draw 10-15 watts constantly. Therefore, identifying and minimizing these loads improves solar system efficiency significantly.
A typical Class A motorhome has phantom loads totaling 300-400 watt-hours daily, equivalent to running a 15-watt LED bulb for 24 hours straight.
Installing individual switches for non-essential phantom loads allows you to reduce consumption during extended boondocking. Furthermore, using DC-to-DC chargers instead of leaving inverters on for small loads improves overall system efficiency and extends battery life.
RV Solar System Components and Sizing
Proper solar system sizing requires calculating each component based on your specific energy consumption and usage patterns. Furthermore, understanding the relationship between solar panels, batteries, charge controllers, and inverters ensures optimal system performance and longevity.
Solar Panel Wattage Requirements Based on Daily Consumption
Solar panel sizing starts with your calculated daily energy consumption in watt-hours. Generally, you need 1.3 to 1.5 times your daily consumption in solar panel capacity to account for charging inefficiencies and weather variations. For example, a 3,000 watt-hour daily consumption requires 3,900-4,500 watts of solar panels.
Peak sun hours in your camping locations determine actual solar generation capacity. Most regions receive 4-6 peak sun hours daily, meaning a 400-watt panel produces 1,600-2,400 watt-hours per day under optimal conditions. Therefore, dividing your daily consumption by available peak sun hours reveals minimum panel requirements.
| Daily Consumption | Minimum Panel Watts | Recommended Panel Watts | Number of 400W Panels |
|---|---|---|---|
| 2,000 Wh | 500W | 800W | 2 |
| 4,000 Wh | 1,000W | 1,600W | 4 |
| 6,000 Wh | 1,500W | 2,400W | 6 |
| 8,000 Wh | 2,000W | 3,200W | 8 |
Additionally, roof space limitations often constrain panel installation on RVs. A typical Class A motorhome accommodates 1,200-2,000 watts of panels, while travel trailers usually handle 400-1,200 watts depending on size and roof configuration.
Battery Bank Capacity Calculation
Battery capacity measured in amp-hours determines how long your RV operates without solar input or shore power. Calculate required capacity by dividing daily consumption by your battery bank voltage, then multiplying by 2-3 days of autonomy for weather contingencies.
Lithium batteries allow 80-90% depth of discharge, while lead-acid batteries should only discharge to 50% for longevity. Consequently, a 4,000 watt-hour daily load requires 667 amp-hours of lithium capacity (4,000Wh ÷ 12V ÷ 0.5 safety factor) or 1,334 amp-hours of lead-acid capacity.
Battery Sizing Formula
Temperature affects battery performance significantly, with cold weather reducing capacity by 20-40%. Therefore, northern climate RVers should increase battery capacity accordingly, while southern travelers can optimize for space and weight savings.
Solar Charge Controller Sizing
Charge controllers regulate power flow from solar panels to batteries, preventing overcharging and optimizing energy harvest. Two main types serve different applications: PWM (Pulse Width Modulation) and MPPT (Maximum Power Point Tracking) controllers.
PWM controllers work efficiently when panel voltage closely matches battery voltage, typically in smaller systems under 400 watts. However, MPPT controllers extract 20-30% more energy from panels by converting excess voltage to additional current, making them ideal for larger installations.
Pros
- Higher efficiency (95-98%)
- Works with high-voltage panels
- Better cold weather performance
- Advanced monitoring features
Cons
- Higher initial cost
- More complex installation
- Requires proper programming
Controller sizing requires calculating maximum current from your solar array. Divide total panel wattage by battery voltage, then add 25% safety margin. For instance, 1,600 watts of panels on a 12V system needs a 133-amp controller (1,600W ÷ 12V × 1.25 = 167A), requiring a 60A MPPT controller minimum.
Inverter Capacity for AC Appliances
Inverter sizing depends on your largest AC loads and total simultaneous consumption. Pure sine wave inverters provide clean power compatible with sensitive electronics, while modified sine wave units cost less but may cause interference with some devices.
Calculate inverter requirements by adding all AC appliances you might operate simultaneously, then multiply by 1.2-1.5 for safety margin. A typical RV setup running microwave (1,200W), coffee maker (800W), and laptop (100W) needs at least a 2,500-watt inverter.
- 1,000-1,500W: Basic electronics, small appliances
- 2,000-3,000W: Microwave, hair dryer, coffee maker
- 3,000W+: Air conditioning, induction cooktop, multiple appliances
Surge capacity handles motor starting loads that require 2-3 times running watts for 3-5 seconds. Therefore, ensure your inverter’s surge rating exceeds the starting requirements of your largest motor-driven appliance, such as air conditioners or refrigerator compressors.
Wiring and Safety Equipment Considerations
Proper wiring ensures safe operation and minimizes voltage drop that reduces system efficiency. Use AWG 10 wire minimum for 30-amp circuits, AWG 8 for 40-amp circuits, and AWG 4/0 for high-current battery connections. Moreover, voltage drop should never exceed 3% in DC circuits.
Safety equipment protects your investment and prevents fires or electrocution. Install fuses or breakers within 7 inches of battery terminals, use appropriately rated disconnects for maintenance, and ensure all connections use marine-grade tinned copper terminals.
Grounding systems connect all metal components to prevent shock hazards and electrical interference. Additionally, proper panel mounting requires structural analysis to ensure roof integrity under wind loads and panel weight.
Safety Requirements
Monitoring systems track performance and identify issues before they become costly problems. Furthermore, battery monitors display state of charge, current flow, and remaining capacity, while charge controller displays show solar production and charging status throughout the day.
Solar Panel Requirements by RV Type and Usage
Different RV types require varying amounts of solar power based on their size, electrical systems, and intended usage patterns. Furthermore, your camping style directly influences how much solar capacity you need to maintain comfortable living conditions off-grid.
Travel Trailers: Weekend Warriors
Travel trailers typically need 200-400 watts of solar panels for weekend camping trips. These lightweight units consume less power due to smaller refrigerators, LED lighting systems, and basic electrical needs. Additionally, weekend usage patterns focus on essential functions like lighting, water pumps, and device charging rather than continuous appliance operation.
A 300-watt solar system provides adequate power for most travel trailers during spring and fall camping seasons. However, winter camping requires additional capacity due to reduced sunlight hours and increased heating demands from furnace fans.
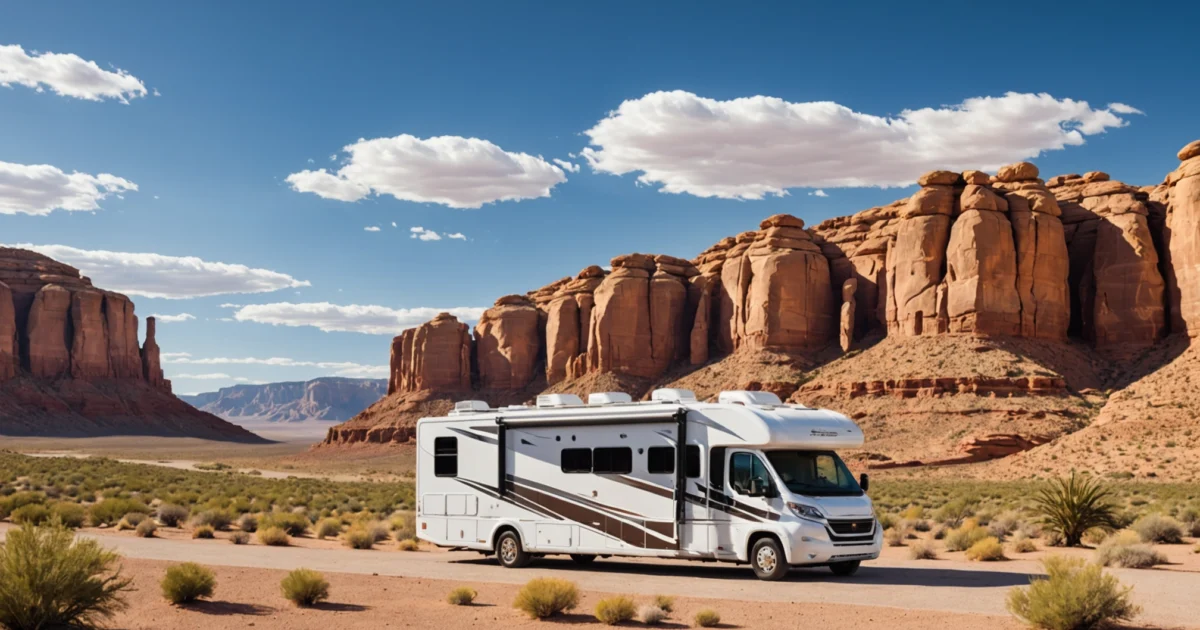
Class A Motorhomes: Full-Time Living Power
Class A motorhomes demand 800-1200 watts of solar panels for full-time living scenarios. These luxury coaches feature residential refrigerators, multiple slide-outs, entertainment systems, and washer/dryer combinations that consume substantial electricity throughout the day.
Full-time RVers operate appliances continuously, requiring robust solar arrays to maintain battery charge during cloudy periods. Moreover, Class A units often have sufficient roof space to accommodate larger solar installations without compromising aerodynamics or structural integrity.
Class B and C RVs: Extended Adventure Power
Class B and C recreational vehicles require 400-800 watts of solar panels for extended trips lasting weeks or months. These mid-size units balance comfort features with mobility, featuring apartment-sized refrigerators, efficient LED lighting, and moderate electrical loads.
Van life enthusiasts often choose 600-watt systems that provide reliable power for remote work setups, including laptops, internet equipment, and small appliances. Consequently, these installations support digital nomad lifestyles while maintaining reasonable installation costs.
Toy Haulers and Fifth Wheels: Heavy-Duty Requirements
Toy haulers and fifth wheels need 600-1000 watts of solar panels due to their large interior spaces and power-hungry amenities. These units feature residential appliances, multiple air conditioning zones, and garage areas with additional electrical outlets for equipment charging.
Fifth wheel owners frequently install 800-watt solar arrays to support extended boondocking while powering washers, microwaves, and entertainment systems. Similarly, toy hauler enthusiasts require substantial capacity to charge electric bikes, tools, and recreational equipment stored in garage compartments.
Critical Factors Affecting Panel Requirements
Several environmental and physical factors determine your actual solar panel needs beyond basic RV type classifications. Therefore, understanding these variables helps optimize system sizing for your specific camping conditions and travel patterns.
- Roof space limitations restrict panel quantity regardless of power needs
- Shading patterns from air conditioners, vents, and awnings reduce effective solar collection
- Panel orientation affects daily energy production by 15-25% depending on mounting angle
- Geographic location influences seasonal sunlight availability and weather patterns
- Camping season preferences determine minimum system requirements for adequate power
Pro Tip
Roof space constraints often limit installations more than power requirements, especially on smaller RVs with multiple roof penetrations. Meanwhile, permanent shading from air conditioning units can reduce panel output by 30-50% in affected areas, requiring careful layout planning during system design.
Panel orientation significantly impacts energy production throughout the day and across seasons. Consequently, tilting panels toward the sun increases winter output but may create wind resistance and clearance issues when traveling between campsites.
Calculating Solar Needs for Specific Scenarios
Different RV usage patterns require dramatically different solar configurations. Moreover, understanding your specific scenario helps determine the exact wattage needed rather than relying on generic recommendations that often fall short of real-world requirements.
Running RV Air Conditioning on Solar Power
RV air conditioning units demand 1,200 to 1,800 watts of continuous power during operation. Consequently, running AC on solar requires substantial battery capacity since air conditioners operate when solar production peaks during midday heat.
A typical 13,500 BTU rooftop unit consumes approximately 1,400 watts while cooling actively. Furthermore, starting surge current can reach 3,000 watts momentarily, requiring inverters rated for these peak demands beyond continuous operation needs.
AC Solar Reality Check
Successful AC operation requires minimum 800 watts of solar panels combined with substantial lithium battery banks. Additionally, energy management becomes critical since AC consumption easily exceeds daily solar production during extended cloudy periods.
30-Amp vs 50-Amp RV Electrical Requirements
Electrical service capacity directly influences solar system sizing since higher-capacity RVs typically contain more power-hungry appliances. Therefore, 50-amp RVs generally require larger solar installations than their 30-amp counterparts.
| RV Type | Typical Load | Recommended Solar | Battery Minimum |
|---|---|---|---|
| 30-Amp RV | 1,500-2,500W | 400-600W | 400-600Ah |
| 50-Amp RV | 3,000-5,000W | 600-1,200W | 600-1,000Ah |
However, actual power consumption depends more on appliance usage patterns than electrical service capacity. Meanwhile, many 50-amp RVs operate efficiently on smaller solar systems when owners practice energy conservation and avoid simultaneous high-draw appliance operation.
Full-Time Living vs Weekend Camping Power Needs
Full-time RV living requires significantly larger solar systems than weekend camping scenarios. Consequently, permanent residents need consistent power for daily activities including work equipment, extended entertainment usage, and frequent cooking appliances.
Weekend campers typically consume 50-100 amp-hours daily with minimal appliance usage and shorter stays. Conversely, full-time residents often require 200-400 amp-hours daily to maintain comfortable living standards without constant generator dependence.
- Weekend camping: 200-400W solar panels sufficient
- Extended trips: 400-600W panels recommended
- Full-time living: 600-1,200W panels typically required
- Work-from-RV: 800-1,500W panels for office equipment
Additionally, full-timers benefit from expandable systems that accommodate seasonal power variations and changing lifestyle needs over extended periods.
Boondocking Duration Impact on System Size
Extended boondocking periods require proportionally larger solar installations since battery reserves must sustain power needs during consecutive cloudy days. Furthermore, longer off-grid stays eliminate generator backup options that many weekend campers rely upon.
Short boondocking trips of 2-3 days can operate on battery reserves alone with minimal solar supplementation. However, week-long adventures require solar production matching daily consumption to prevent battery depletion mid-trip.
Plan for 3-4 consecutive cloudy days when sizing solar systems for extended boondocking adventures
Extended boondocking beyond two weeks demands oversized solar arrays producing 120-150% of daily consumption. This surplus capacity ensures adequate charging during partial sun conditions and maintains battery health through complete charge cycles.
Geographic Location and Sun Hours Consideration
Geographic location dramatically affects solar panel requirements since available sunlight varies significantly across regions and seasons. Therefore, RVers traveling diverse climates need systems sized for worst-case scenarios rather than optimal conditions.
Southern states receive 5-7 peak sun hours daily year-round, while northern regions may experience only 2-3 hours during winter months. Consequently, snowbirds following seasonal migration patterns can optimize systems for specific travel routes and timing.
| Region | Summer Sun Hours | Winter Sun Hours | System Multiplier |
|---|---|---|---|
| Southwest US | 6-7 hours | 4-5 hours | 1.0x |
| Southeast US | 5-6 hours | 3-4 hours | 1.2x |
| Pacific Northwest | 4-5 hours | 1-2 hours | 1.8x |
| Northern States | 4-6 hours | 2-3 hours | 1.5x |
Additionally, elevation affects solar performance with higher altitudes receiving more intense sunlight but experiencing greater temperature variations. Meanwhile, coastal areas often deal with marine layer clouds that reduce morning solar production significantly.
Smart RV solar planning considers seasonal travel patterns and adjusts system sizing accordingly. For instance, winter camping in Arizona requires different calculations than summer adventures in Alaska or extended stays in cloudy Pacific Northwest regions.
Battery Bank Sizing for RV Solar Systems
Battery bank sizing determines whether your RV solar system provides reliable power during cloudy days and overnight periods. Furthermore, proper battery capacity calculations ensure your system meets energy demands without compromising battery lifespan or performance.
Lithium vs Lead-Acid Battery Capacity Calculations
Lithium batteries offer usable capacity ratings at face value, while lead-acid batteries require significant derating for practical applications. Specifically, lithium iron phosphate (LiFePO4) batteries deliver nearly 100% of their rated capacity safely.
Conversely, lead-acid batteries should never discharge below 50% capacity to maintain longevity. Therefore, a 200Ah lead-acid battery provides only 100Ah of usable energy, whereas a 200Ah lithium battery delivers the full 200Ah capacity.
| Battery Type | Rated Capacity | Usable Capacity | Efficiency Factor |
|---|---|---|---|
| Lead-Acid (Flooded) | 200Ah | 100Ah | 50% |
| AGM Lead-Acid | 200Ah | 120Ah | 60% |
| Lithium (LiFePO4) | 200Ah | 190Ah | 95% |
Additionally, lithium batteries charge faster and maintain voltage levels throughout discharge cycles. Meanwhile, lead-acid batteries experience voltage drops that reduce appliance efficiency as capacity depletes.
Days of Autonomy Planning
Days of autonomy represent how long your battery bank sustains RV operations without solar charging input. Most RV solar systems target 2-3 days of autonomy to handle extended cloudy periods and unexpected weather patterns.
Calculate autonomy requirements by multiplying daily energy consumption by desired backup days. For example, an RV consuming 150Ah daily needs 450Ah of usable battery capacity for three-day autonomy.
Autonomy Calculation Formula
However, extended boondocking adventures may require 4-5 days of autonomy, especially when traveling through regions with unpredictable weather patterns. Consequently, serious off-grid RVers often oversize battery banks to ensure energy security.
Depth of Discharge Considerations
Depth of discharge (DoD) measures how much battery capacity gets used before recharging occurs. Different battery chemistries tolerate varying discharge depths, directly impacting system sizing requirements and battery replacement costs.
Lead-acid batteries suffer permanent damage when discharged below 50% DoD regularly, while lithium batteries safely operate down to 20% DoD without capacity loss. Therefore, lithium systems require smaller battery banks for equivalent energy storage.
- Flooded Lead-Acid: Maximum 50% DoD for longevity
- AGM Batteries: Can handle 60-70% DoD occasionally
- Gel Batteries: Limited to 50% DoD for optimal lifespan
- Lithium Iron Phosphate: Safe operation to 80% DoD daily
Moreover, frequent deep discharges reduce lead-acid battery lifespan from 3-5 years to 1-2 years. In contrast, lithium batteries maintain capacity through thousands of deep discharge cycles.
Battery Bank Voltage Configuration
Battery bank voltage configuration affects system efficiency, wire sizing requirements, and component compatibility. 12V systems work well for smaller RVs, while larger installations benefit from 24V or 48V configurations.
Higher voltage systems reduce current flow, allowing smaller wire gauges and minimizing voltage drop losses. Additionally, 24V systems cut current requirements in half compared to 12V configurations, improving overall efficiency.
| System Voltage | Best Applications | Wire Size Benefits | Inverter Options |
|---|---|---|---|
| 12V | Small RVs, basic needs | Larger wire required | Most available |
| 24V | Medium RVs, moderate power | 50% smaller wire | Good selection |
| 48V | Large RVs, high power | 75% smaller wire | Limited options |
Furthermore, 48V systems excel in large RVs with substantial energy demands but require specialized components. Most RV appliances operate on 12V, necessitating DC-DC converters in higher voltage systems.
Temperature Effects on Battery Performance
Temperature significantly impacts battery capacity, charging efficiency, and lifespan across all battery chemistries. Cold temperatures reduce available capacity, while excessive heat accelerates chemical degradation and shortens battery life.
Lead-acid batteries lose approximately 20% capacity at 32°F compared to 77°F performance levels. Meanwhile, lithium batteries maintain better cold weather performance but still experience reduced capacity in freezing conditions.
Conversely, high temperatures above 100°F increase self-discharge rates and accelerate electrolyte breakdown in lead-acid batteries. Lithium batteries handle heat better but require thermal management systems in extreme conditions.
Smart battery management systems monitor temperature and adjust charging parameters automatically. Additionally, insulating battery compartments and providing ventilation helps maintain optimal operating temperatures year-round.
Popular RV Solar Kit Configurations
Choosing the right solar kit configuration depends on your power consumption patterns, RV size, and travel lifestyle. Most manufacturers offer pre-configured packages that simplify the selection process while ensuring component compatibility.
200-400 Watt Starter Kits for Light Usage
Entry-level solar kits ranging from 200 to 400 watts suit weekend warriors and occasional campers perfectly. These systems typically include two 100-watt panels or four 100-watt panels, a basic charge controller, and essential mounting hardware.
A 200-watt system generates approximately 800-1200 watt-hours daily under optimal conditions. This capacity powers LED lighting, phone charging, small fans, and basic electronics comfortably. However, running larger appliances like microwaves or hair dryers requires shore power or generator backup.
Meanwhile, 400-watt configurations double the daily energy production to 1600-2400 watt-hours. This increased capacity supports longer off-grid stays and powers additional devices like laptops, small refrigerators, and water pumps consistently.
800 Watt Systems for Moderate to Heavy Usage
Mid-range 800-watt systems represent the sweet spot for many RV owners who camp regularly and desire energy independence. These configurations typically feature eight 100-watt panels or four 200-watt panels with advanced MPPT charge controllers.
An 800-watt solar array produces 3200-4800 watt-hours daily, supporting moderate appliance usage including coffee makers, small microwaves, and entertainment systems. Furthermore, this capacity allows comfortable living without constant energy conservation concerns.
800-watt systems generate enough power for 75% of typical RV electrical needs without generator assistance
Additionally, 800-watt configurations provide sufficient power for running 12V refrigerators, multiple LED light fixtures, and charging stations for electronic devices simultaneously. Most systems include 400-800Ah battery banks to store excess energy for nighttime and cloudy weather usage.
1200+ Watt Systems for Full-Time Living with AC
High-capacity systems exceeding 1200 watts cater to full-time RVers and those requiring air conditioning capabilities. These robust configurations often feature 1200-2000 watts of solar panels paired with substantial battery banks and high-efficiency inverters.
A 1200-watt system generates 4800-7200 watt-hours daily, enabling operation of energy-intensive appliances including residential refrigerators, washing machines, and limited air conditioning usage. However, running AC continuously still requires careful energy management and optimal weather conditions.
Moreover, 1600-2000 watt systems approach true energy independence for most RV applications. These installations support simultaneous operation of multiple appliances and provide sufficient power reserves for extended cloudy periods without generator dependence.
Expandable vs Complete System Packages
Expandable solar kits offer flexibility for future power needs growth while minimizing initial investment costs. These systems include oversized charge controllers and wiring infrastructure to accommodate additional panels without major component replacements.
| System Type | Initial Cost | Expansion Capability | Best For |
|---|---|---|---|
| Expandable Kit | Lower | Easy addition | Growing needs |
| Complete Package | Higher | Limited | Known requirements |
| Modular System | Variable | Unlimited | Custom builds |
Conversely, complete system packages provide everything needed for immediate installation and operation. These comprehensive kits include precisely matched components but offer limited expansion possibilities without significant modifications.
Furthermore, modular approaches allow custom configuration selection based on specific requirements. This flexibility comes with increased complexity and requires more technical knowledge for proper component matching and system design.
DIY Installation vs Professional Setup Considerations
DIY installation appeals to mechanically inclined RV owners seeking cost savings and system understanding. Most solar kits include detailed instructions, and basic installations require only common tools and electrical knowledge.
However, roof penetrations for mounting hardware create potential leak points requiring careful sealing and waterproofing techniques. Additionally, electrical connections must meet safety codes and manufacturer specifications to prevent fire hazards or system damage.
Professional installation ensures proper mounting, electrical connections, and warranty compliance while providing peace of mind for complex systems. Certified installers understand local codes, optimal panel placement, and advanced wiring techniques for maximum efficiency.
Nevertheless, professional solar installation costs typically range from $500-2000 depending on system complexity and regional labor rates. This investment often proves worthwhile for larger systems or installations requiring specialized equipment and expertise.
Pros
- Lower upfront costs
- Complete system understanding
- Flexible timing
- Learning experience
Cons
- Warranty concerns
- Safety risks
- Time investment
- Technical complexity
Solar Sizing Tools and Calculators
Accurate solar system sizing determines the difference between adequate power generation and energy shortfalls during your RV adventures. Modern calculation tools simplify this complex process while providing reliable estimates for your specific power requirements and travel patterns.
Online RV Solar Calculators and Their Accuracy
Digital solar calculators provide quick estimates by analyzing your appliance usage, travel destinations, and energy consumption patterns. Popular tools like Solar Power with Will and Battle Born Batteries calculator offer comprehensive assessments with varying degrees of precision.
These calculators typically achieve 80-90% accuracy when users input detailed appliance specifications and realistic usage patterns. However, simplified calculators often underestimate power requirements by failing to account for inverter losses, battery aging, and seasonal variations in solar production.
Calculator Limitations
Advanced calculators incorporate geographic solar irradiance data, providing location-specific estimates that reflect regional sunshine hours and seasonal variations. These sophisticated tools deliver more reliable results for full-time RVers planning extended stays in specific regions.
Manual Calculation Methods and Formulas
Manual calculations offer precise control over variables while building deeper understanding of your RV’s energy ecosystem. The fundamental formula multiplies daily energy consumption (in watt-hours) by a safety factor, then divides by average daily solar production hours.
Start by calculating total daily consumption: Daily Wh = (Appliance Watts × Hours Used) + (Appliance 2 Watts × Hours Used) for each device. Subsequently, add a 20-30% safety margin to account for inefficiencies and unexpected usage spikes.
- Calculate total daily energy needs in watt-hours
- Add 25% safety factor for system losses
- Divide by average peak sun hours for your region
- Account for battery depth of discharge limitations
- Size panels 15-20% larger for weather contingencies
Professional installers often apply the “33% rule” which suggests sizing solar arrays at 133% of calculated needs to ensure adequate power generation during suboptimal conditions. This conservative approach prevents system undersizing while accommodating future power needs expansion.
Energy Monitoring Tools for Existing RVs
Real-time energy monitoring provides invaluable data for accurate solar sizing by tracking actual consumption patterns rather than theoretical estimates. Smart monitoring systems like Victron BMV-712 and Renogy BT-2 Bluetooth module deliver precise measurements of energy flow, battery state, and system performance.
These monitoring solutions track cumulative energy consumption over weeks or months, revealing usage patterns that manual calculations often miss. Additionally, they identify energy-hungry appliances and highlight opportunities for efficiency improvements before solar installation.
| Monitor Type | Accuracy | Key Features | Price Range |
|---|---|---|---|
| Battery Monitor | ±1% | State of charge, amp-hours | $150-300 |
| Smart Shunt | ±0.5% | Bluetooth, historical data | $200-400 |
| System Monitor | ±2% | Solar production, load analysis | $300-600 |
Advanced monitoring systems integrate with smartphone apps, enabling remote system oversight and data logging for long-term analysis. This historical data proves essential for sizing solar systems that accommodate seasonal variations and changing travel patterns.
Professional Assessment Services
Professional solar assessments combine technical expertise with hands-on evaluation of your specific RV and usage requirements. Certified installers analyze roof space, shading patterns, electrical systems, and travel plans to create customized solar solutions.
These comprehensive evaluations typically cost $100-300 but often include credits toward installation services. Professional assessments identify potential installation challenges, optimal panel placement, and integration requirements that DIY calculations might overlook.
Furthermore, professional services provide warranty coverage and ensure code compliance for complex installations. Many assessment providers offer detailed reports with multiple system options, allowing informed decision-making based on budget and performance priorities.
Mobile Apps for Solar System Planning
Smartphone applications bring solar planning tools directly to your RV, enabling on-the-go calculations and system monitoring. Popular apps like Solar Calculator Plus and PV*SOL mobile offer sophisticated modeling capabilities with user-friendly interfaces.
These applications incorporate GPS data to provide location-specific solar irradiance values and weather patterns. Consequently, they deliver more accurate estimates than generic calculators while accounting for your actual travel routes and seasonal camping preferences.
Advanced planning apps integrate with existing monitoring hardware, creating comprehensive energy management platforms. These integrated solutions track consumption patterns, predict solar generation, and recommend system optimizations based on real-world performance data.
Professional assessments identify 15-25% more optimization opportunities than self-calculated systems
Mobile apps excel at scenario modeling, allowing comparison of different panel configurations, battery capacities, and component selections. This flexibility enables informed decision-making while visualizing the impact of various system choices on performance and cost.
Cost Considerations and ROI
Understanding the financial investment required for RV solar systems enables informed decision-making and realistic budget planning. Initial costs vary significantly based on system size, component quality, and installation complexity, while long-term savings depend on usage patterns and camping habits.
Initial Investment by System Size
Small 200-400 watt systems typically cost between $800-$1,500 for basic setups with monocrystalline panels and PWM charge controllers. These entry-level configurations provide sufficient power for LED lighting, phone charging, and small appliances during weekend trips.
Mid-size 600-800 watt installations range from $2,000-$4,000, incorporating MPPT controllers and lithium battery options. Furthermore, these systems support refrigeration, water pumps, and moderate inverter loads for extended boondocking adventures.
| System Size | Cost Range | Typical Components | Usage Capacity |
|---|---|---|---|
| 200-400W | $800-$1,500 | Basic panels, PWM controller | Weekend camping |
| 600-800W | $2,000-$4,000 | MPPT controller, lithium option | Extended boondocking |
| 1000-1200W+ | $4,500-$8,000 | Premium components, monitoring | Full-time living |
Large 1000-1200+ watt systems cost $4,500-$8,000 or more, featuring premium components and comprehensive monitoring capabilities. These installations support full-time RV living with air conditioning, electric heating, and unlimited device charging capacity.
Cost Per Watt Analysis
Monocrystalline panels average $0.80-$1.20 per watt for quality residential-grade modules, offering superior efficiency and longevity. Polycrystalline alternatives cost $0.60-$0.90 per watt but require more roof space for equivalent power output.
Flexible panels command premium pricing at $1.50-$2.50 per watt due to specialized manufacturing processes and installation versatility. However, their reduced lifespan and lower efficiency make them cost-effective only for specific applications requiring curved mounting surfaces.
Cost Optimization Tip
Installation Cost Comparison
DIY installations eliminate labor costs but require significant time investment and technical knowledge. Basic tool requirements include drill, wire strippers, multimeter, and sealants, representing approximately $200-$400 in equipment costs for first-time installers.
Professional installation services charge $1,500-$3,500 depending on system complexity and regional labor rates. Additionally, certified installers provide warranty coverage, code compliance verification, and optimal component placement for maximum performance.
- DIY installation: $0 labor + $200-$400 tools
- Mobile installer: $1,500-$2,500 service call
- RV dealer installation: $2,000-$3,500 full service
- Solar specialty shop: $1,800-$3,000 with warranty
Payback Period Calculations
Campground fees average $35-$65 per night for sites with electrical hookups, while boondocking extends free camping opportunities indefinitely. Consequently, frequent campers achieve faster payback periods through reduced campground dependency and increased camping frequency.
A typical $3,000 solar system pays for itself within 2-4 years for full-time RVers who camp 200+ nights annually. Weekend warriors require 4-7 years for complete cost recovery, though savings accelerate with increased usage and rising campground fees.
Solar systems typically achieve 100% ROI within 2-4 years for full-time RVers
Generator fuel costs add another dimension to payback calculations, with propane expenses averaging $8-$15 per day for equivalent power generation. Therefore, solar systems eliminate ongoing fuel costs while reducing noise pollution and maintenance requirements.
Financing Options and Incentives
Personal loans for RV solar installations offer 5-12% interest rates with 2-7 year terms, enabling immediate system installation without large upfront payments. Many solar retailers partner with financing companies to provide competitive rates and streamlined approval processes.
Federal tax credits apply to RV solar installations when the vehicle serves as a qualified residence, providing 30% credit through 2032. However, eligibility requires the RV to have sleeping, cooking, and toilet facilities for tax qualification purposes.
Manufacturer rebates and seasonal promotions reduce system costs by $200-$800 during peak sales periods. Moreover, some states offer additional incentives for mobile solar installations, though programs vary significantly by location and residency requirements.
Credit card financing enables immediate purchase while earning rewards points, though higher interest rates make this option suitable only for short-term financing. Additionally, some cards offer promotional 0% APR periods that eliminate interest costs for qualified buyers with strong credit profiles.
Installation and Maintenance Requirements
Roof Mounting Considerations and Weight Limits
RV roofs support 10-15 pounds per square foot maximum weight capacity, requiring careful calculation before solar panel installation. Standard residential panels weigh 40-50 pounds each, while lightweight RV panels reduce weight to 25-35 pounds per panel. Furthermore, mounting hardware adds another 5-10 pounds per panel to total roof load calculations.
Fiberglass roofs provide stronger mounting surfaces than aluminum or rubber membrane roofs, supporting heavier panel configurations. However, structural reinforcement becomes necessary when installing systems exceeding 400 watts on older RVs with weaker roof construction. Additionally, mounting brackets must penetrate roof membranes, creating potential leak points that require professional sealing techniques.
Aerodynamic considerations affect fuel efficiency and panel stability during highway travel. Consequently, low-profile mounting systems reduce wind resistance while maintaining secure panel attachment. Moreover, flexible panels conform to curved roof surfaces but sacrifice efficiency compared to rigid mounting systems.
Electrical Connections and Safety Codes
RV solar installations must comply with National Electrical Code (NEC) Article 551 for recreational vehicles and mobile structures. DC wiring requires 12 AWG copper wire minimum for runs under 10 feet, while longer distances demand 10 AWG or larger to prevent voltage drop issues. Additionally, all connections need weatherproof enclosures rated for outdoor exposure and vibration resistance.
Ground fault circuit interrupters (GFCI) protect against electrical hazards in wet conditions, requiring installation on all solar circuits. Furthermore, rapid shutdown devices enable emergency disconnection within 10 seconds for firefighter safety during emergencies. Charge controllers must include overcurrent protection and proper grounding to chassis ground systems.
Professional installation ensures code compliance while maintaining manufacturer warranties on electrical components. However, DIY installations void warranties and create liability issues if improper wiring causes fires or electrical damage. Therefore, certified electricians familiar with RV systems provide the safest installation approach.
System Monitoring and Maintenance Schedules
Daily monitoring involves checking battery voltage levels and solar production through digital displays or smartphone apps. Battery voltage should remain above 12.1 volts for healthy lead-acid batteries, while lithium systems maintain 13.0+ volts under normal conditions. Additionally, charge controller displays show daily energy harvest and system status indicators.
- Weekly: Clean panels with soft brush and mild soap solution
- Monthly: Inspect all electrical connections for corrosion or looseness
- Quarterly: Test battery capacity and check water levels in flooded batteries
- Annually: Professional system inspection and performance testing
Remote monitoring systems send alerts when production drops below expected levels or battery voltages indicate problems. Consequently, early detection prevents minor issues from becoming expensive repairs. Moreover, monitoring data helps optimize energy usage patterns and identify inefficient appliances.
Troubleshooting Common Issues
Low solar production often results from shading, dirty panels, or loose connections rather than equipment failure. Panel shading from even small objects reduces entire string output by 50-80% due to bypass diode limitations. Therefore, regular visual inspections identify obstructions like leaves, bird droppings, or accumulated road grime.
Battery charging problems typically indicate faulty charge controller settings or aging battery banks requiring replacement. Solar panel installation guides provide troubleshooting steps for common electrical issues. Furthermore, multimeter testing verifies proper voltage and current flow through system components.
Safety Warning
Inverter failures manifest as error codes, overheating, or complete shutdown during high-demand periods. Most inverter problems stem from inadequate ventilation or overloading beyond rated capacity. Additionally, pure sine wave inverters require different troubleshooting approaches than modified sine wave units.
Warranty Considerations for Different Components
Solar panels carry 20-25 year performance warranties guaranteeing 80% output after 20 years of operation. However, RV applications void residential warranties due to mobile installation and vibration exposure. Therefore, RV-specific panels include warranties covering mobile applications and extreme temperature cycling.
| Component | Warranty Period | Coverage Details |
|---|---|---|
| Solar Panels | 10-25 years | Power output and defects |
| Charge Controllers | 2-5 years | Electronics and programming |
| Inverters | 2-10 years | Power conversion and components |
| Batteries | 1-10 years | Capacity and cycle life |
Battery warranties vary significantly between lead-acid (1-3 years) and lithium systems (5-10 years) with different cycle life guarantees. Lithium manufacturers typically warrant 3,000-6,000 cycles before capacity drops below 80% of original rating. Conversely, lead-acid warranties cover manufacturing defects but exclude capacity degradation from normal use.
Installation warranties from certified dealers provide additional protection covering workmanship and system integration issues. Professional installation maintains component warranties while adding installer liability coverage for potential damage. Therefore, warranty considerations should influence both component selection and installation method choices.
Frequently Asked Questions
How many solar panels do I need to run everything in my RV?
The number of solar panels needed depends on your total daily energy consumption and panel wattage. For full-time living with all appliances including AC, you’ll typically need 6-8 panels of 200 watts each (1,200-1,600 watts total). Weekend campers can often manage with 2-4 panels (400-800 watts) for basic needs like lights, water pump, and refrigeration.
Can you run an RV completely on solar power?
Yes, you can run an RV completely on solar power with proper system sizing. Full-time solar living requires 800-1,600 watts of panels, adequate battery storage (400-800 amp-hours), and energy-efficient appliances. However, you may need to modify usage patterns during cloudy weather or use propane alternatives for high-consumption appliances like water heaters and cooktops.
What is the 33% rule in solar panels?
The 33% rule suggests that your solar panel wattage should be at least 33% of your battery bank capacity in amp-hours. For example, a 300 amp-hour battery bank would need approximately 100 watts of solar panels minimum. However, most RV solar experts recommend a higher ratio of 50-100% for faster charging and better performance during suboptimal conditions.
How much solar do I need for my 40 ft camper to live in full time?
A 40-foot RV for full-time living typically requires 1,200-2,000 watts of solar panels depending on your lifestyle and appliances. Larger RVs often have residential refrigerators, multiple AC units, and more electronics, increasing daily consumption to 6,000-10,000 watt-hours. Plan for 800-1,200 amp-hours of battery storage to support this system size.
How much solar power do I need for my RV AC?
Running RV air conditioning requires 1,200-1,500 watts of solar panels minimum for a single 13,500 BTU unit. However, AC units consume 9,000-12,000 watt-hours daily when running 8 hours, so you’ll need substantial battery storage (600+ amp-hours) and may require generator backup during extended cloudy periods or overnight operation.
How much solar power do I need for a 50 amp RV?
A 50-amp RV service doesn’t directly determine solar needs, but these larger RVs typically require 800-1,600 watts of solar panels. The 50-amp service indicates higher electrical capacity for shore power, often meaning residential appliances and dual AC units. Calculate your actual daily consumption rather than relying on electrical service size for solar system planning.
How many solar panels do I need to run a 30 amp RV?
Most 30-amp RVs need 4-6 solar panels (800-1,200 watts total) for comfortable off-grid living. These RVs typically consume 3,000-6,000 watt-hours daily with standard appliances. Start with 400-600 watts for weekend camping and expand as needed based on your actual usage patterns.
How many batteries do I need for my RV solar system?
Battery bank sizing depends on your daily consumption and desired autonomy. For 2-3 days of backup power, multiply your daily watt-hour consumption by 2.5-3, then divide by battery voltage. A typical setup consuming 4,000 watt-hours daily needs 400-600 amp-hours of lithium batteries or 800-1,200 amp-hours of lead-acid batteries.
Is an 800 watt solar panel kit enough for my RV?
An 800-watt solar kit works well for moderate to heavy RV usage without air conditioning. This size typically generates 3,200-4,800 watt-hours daily in good sun conditions, supporting refrigeration, lighting, electronics, and small appliances. It’s ideal for extended boondocking but may require energy management during cloudy weather or high-consumption periods.
How do I calculate my RV’s daily power consumption?
Calculate daily consumption by listing every electrical device, noting its wattage, and multiplying by daily usage hours. Add all devices together for total watt-hours. For example: LED lights (10W × 5 hours = 50Wh) + refrigerator (200W × 18 hours = 3,600Wh). Use a kill-a-watt meter for accurate measurements of actual power draw.
What size charge controller do I need for my RV solar system?
Choose a charge controller rated for 125-130% of your solar panel amperage to handle peak conditions. For an 800-watt system (approximately 50 amps), select a 60-80 amp MPPT controller. MPPT controllers are more efficient than PWM types and essential for systems over 200 watts.
Should I choose lithium or lead-acid batteries for my RV solar system?
Lithium batteries offer superior performance with 90-95% usable capacity, 2,000-5,000 cycle life, and faster charging. Lead-acid batteries cost less upfront but provide only 50% usable capacity and 300-500 cycles. For serious boondocking, lithium batteries justify their higher cost through better performance and longevity.
How does weather affect my RV solar panel performance?
Solar panel output varies significantly with weather conditions. Cloudy days reduce output by 60-80%, while partial shade can decrease production by 20-50%. Winter months provide 30-50% less generation due to shorter days and lower sun angles. Plan for 3-5 days of battery autonomy to handle extended cloudy periods.
Can I install RV solar panels myself?
DIY solar installation is possible with basic electrical knowledge and proper tools. Roof mounting requires careful sealing to prevent leaks, while electrical connections need proper fusing and grounding. Consider professional installation for complex systems or if you’re uncomfortable with electrical work, as mistakes can be costly and dangerous.
What’s the difference between monocrystalline and polycrystalline solar panels for RVs?
Monocrystalline panels offer higher efficiency (18-22%) and better performance in low light conditions, making them ideal for limited RV roof space. Polycrystalline panels cost less but provide lower efficiency (15-17%). For RV applications, monocrystalline panels are generally preferred despite higher cost due to space constraints.
You May Also Like
How Long Solar Panels Last Without Sun: Performance Guide 2026
How to Reset Solar Lights: Complete Step-by-Step Guide 2026